Showing posts with label Metal. Show all posts

Wednesday, May 28, 2014

Patterns

Believe it or not, I have been trying to get this card posted for over a week now!!  

It would seem that my secretary tends to overbook the calendar. I really need to fire her.  

Oh wait.  That would be me. 

Can one be fired from a job that one doesn't get paid for?

Sigh.

At any rate, I made this card for a fellow paper crafter, who just happens to be our office PR gal. We celebrated her birthday last week.  

I originally had just planned to use another print from this particular paper pack that had these wonderful flocked/raised flowers on it.  I was running short on time and was going to let the paper do all the work for me.

Then, I had a brain freeze and decided to embellish the card myself.

 No, I prefer to think that I took advantage of the excuse of needing to make a card to carve out a bit more creative time.  

Or, I had a brain freeze. 


The 5 inch square card base is Gina K's Pure Luxury 120# in Ivory.  I then ruined utilized several pieces of black paper in my attempts to try and punch out the decorative border, keeping a straight line.  I obviously failed and after the millionth attempt, (only a slight exaggeration, I assure you), I gave up and figured no one would notice the uneven framing of the patterned paper (from an old DCWV paper pack) but me.

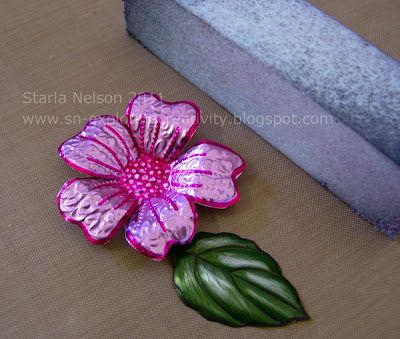
The flower was die cut from some bright, rich red metal that a friend gave me.  I could not capture the actual color with my photo or correct with my limited photo editing skills.  The flower was die cut using the Tattered Florals Die.  I used a decorative wheel and the Cuttlebug Swiss Dots embossing folder to make the pattern and lightly sanded with a burnishing block.  

I had figured out that I could stamp on the ribbon BUT! Alas, another brain freeze attacked and I adhered the flower (with E600 glue, no less) prior to the stamping.  That rendered my trusty stampamajig useless as I could not bend up the petals enough to place the jig where I needed it to make sure my stamping was straight.  After several failed attempts to fashion a more narrow jig from Legos that actually worked correctly, I finally stamped on some velum paper and adhered with velum adhesive to the ribbon.

Note to self:  DO NOT USE YOUR PRECIOUS METAL FOR CO-WORKER'S CARDS!!!  It would seem that when other co-workers are signing the card, they don't appreciate the the delicacy of embellishments.  This poor flower was smooshed, smashed, bent and crumbled every which way!! 

That's it for me today!! I now need to change the creative gears and try to come up with a card for the Oldest Kiddo.  It would seem he needs a b-day card by Friday!!

Nope.  No panicking here!!

'Till next time!


Monday, November 11, 2013

Gelli Prints and Metal Roses

I had a very creative weekend as it seemed everyone and my mother in law celebrated birthdays!!

Okay.  That is a slight exaggeration, but I cranked out 3 cards in one weekend.  And if you have visited this blog much in the past, you know that makes up more creativity than I usually manage in a month!!

I, of course, will only share one card today!! I am going to take advantage of having a "stash" of work to share over the next week or so!! hehe

While I was on the creative endeavor to make my father in law a birthday card a couple of weeks ago, (the card that actually came to be can be seen here ) I actually started out with the idea for a Gelli Print on the sticky side of a self laminating sheet.

Allow me to digress.  Making Gelli Prints on packing tape or the sticky side of a self laminating sheet is probably one of my most favorite Gelli Print techniques.  While I love the "unknown" outcomes with the more traditional methods of making monoprints with the Gelli Plate, I really, really REALLY like the process of planning out what what direction my print will take.

I might have a little issue with control.  Or just letting my art F....L...O....W....

ANYHOOS!!  I made this wonderful turquoise and copper print a couple of weeks ago and for the life of me, could NOT figure out how "finish" the card without taking away from the print.

Sometimes, walking away is the best way to complete a creative project.

So, I started with the background.......


Gelli print made with some turquoise and brown acrylic paint (stash) brayered over the TCW's Mini Gears stencil. Copper Pearl Ex was then applied on the "clear" area of the print. 

And rediscovered my love of working with metal.......


Roses were die cut from Ten Second Studios Dark Chocolate Metal with Spellbinders/Donna Salazar's Rose Creation dies.  The leaves are from Spellbinder's Foliage and the flourish is an old Sizzix die.   

Finished with  a little extra wire and bling ! Who needs a sentiment?! Not this card!!

I will admit that this card ended up being more than what I had envisioned.  But I thoroughly enjoyed working with the metal sheets again and have vowed to pull out that medium more often in the future!!

'Till next time..............


Wednesday, April 10, 2013

Canvas Message Board

I am so thankful that Kim from eP invited me to be a guest DT for the month of April.  My creative wheels have been turning in over drive!!  

This week I'm sharing how I altered an 8 x 8" canvas board to create a message board.


I hope that you will head over to the eP blog  for more details as to how I made this!!

'Till next week.....make sure you add some creativity time on your calendar!!


Monday, December 24, 2012

Christmas Joy

It's raining here in Southern California.  No snowflakes falling for Christmas Eve.  While I'd like just a light dusting of the white stuff just for today and tomorrow, I'm perfectly satisfied without the cold temps and dealing with the white fluff otherwise!!

So, today I'm sharing a very simple wish of Christmas Joy.  However you celebrate this season, I wish you Joy.


Basic details:  Base Gina K's Pure Luxury White.  DP:  BoBunny.  Spellbinder's Create a Flake One.  Metal:  Ten Second Studios.  Sentiment:  stickers from my stash.  

Until next time..............


Monday, December 10, 2012

Chocolate Rose

OOOOO!! I'm doing good!  I have managed to get another card done today before the month has past, LOL!!

Seriously, I do consider this an accomplishment, considering my incredibly overbooked calendar!!

I needed to make a dear friend a birthday card.  I had an inspiration piece in my mind and thought I had mapped out exactly how the card was going to look.

Does anyone else experience the artistic curve ball of having your perfectly thought out idea totally fail? I actually experience this creative detour more often than not. And while I usually don't mind this creative detour, I happened to have just a teeny tiny time crunch staring me in the face.

As in I was down to a total of about 45 minutes to come up with Plan B, get into the shower, get somewhat presentable and head out the door.


I stuck with my color inspiration and desire to use metal.  I had to forgo the original focal point idea (had to do with various swirls and such) and went with Plan B to go to my basic card layout of late with a flower focal point.  

Sigh.  Sometimes you just have to stick with the tried and true!

Basic details:  Metal is from TenSecond Studios in Dark Chocolate and Peacock.  I cut a strip of the Peacock and scored with my Scor-Buddy.  Adhered to the card with Scor-tape.  The rose was die cut with Donna Salazar's/Spellbinders Create a Rose.  Embossed with Spellbinder's M-bossabilities Ornamental Iron.  Sanded off the raised portion to expose the aluminium.  The same steps that can be see in this Black Metal Rose post.    The swirls and leaves were die cut from more of the Dark Chocolate Metal using Spellbinder's Doodle Parts and the leaves from the Create a Rose set.  The rose was adhered together with a hot glue gun for time's sake.   The sentiment stamped and I called her "good enough"!

This is the last week of school before the Christmas break.  I have about a million things that need to be completed but am hoping to get at least a half dozen completed, LOL!! 

'Till then................


Thursday, December 6, 2012

Black Metal Rose

Howdy Strangers!! Oh wait!  It's me that has been missing for a while!!

 I was all set to apologize for my absence, but then I realized that I would be apologizing for the fact that I have been busy with family happenings that have trumped creating.

And to be honest, I'm working on NOT feeling guilty or feel that I need to apologize for that.  I sooo admire those who are busy with family, jobs and life happenings, yet are still able to create several times a week.

Nope.  That's not me.

But!  You didn't drop by to hear me ramble about my weird guilt trips!

This week the high school boys are gearing up to ask out dates for the Winter Banquet.  Oldest kiddo is going to ask a classmate who shares his preference for 80's rock and metal music.  When he asked other friends to find out her favorite flower, she replied she likes "black roses.  A single black rose".  

Now, I don't know if she was being silly, but a black rose she will be getting!!

A black metal rose, that is.  


I have made roses out of metal before, using die cuts.  But I wanted a larger rose than what my available dies  were going to allow me to make.  I went online and found this template that I felt would work perfectly.  

I printed off the template onto regular copy paper.  I then traced  the templates with a Teflon refiner (you can use a stylus also) onto the metal by layering a thin mat, the metal and copy paper.


After tracing and cutting out the different pieces, I ran each layer through my Big Shot with Spellbinders M-Bossabilities Ornamental Iron.  


I then used a burnishing block to sand off the raised portions to expose the silver aluminium.


Usually, when making roses, you glue the petals of the larger layers into a cone shape.  Since I was wanting to adhere the rose onto a "stem" (a bamboo skewer wrapped in more of the black metal), I skipped that step. Using a hot glue gun, **Warning** Hot glue on metal gets HOT!  Be careful when handling!! I built up from the center out, wrapping and gluing each layer as I went.  Sorry there are no pictures of this step.  My hands were a tad bit occupied trying to maneuver the metal over the hot glue without leaving too much skin!! 


I wish you could see the texture and layers better!! Trying to photograph shiny metal at night is a bit beyond my photography skills at this time! LOL!!  The layers and texture add an elegance, yet still edgy, look to this "black rose".  

Basic supplies:  Rose Template from Ellinee.com.  Metal, mat, burnishing block (sanding block) and Teflon refiner:   Ten Second Studios Rock Star Black.  Embossing folders:  Spellbinders M-bossabilities Ornamental Iron and Cuttlebug Swiss dots.  

Well, that's it for me today!  I need to clean up this mess and start thinking about a couple of other projects that I would like to get done by this weekend!  

'Till then.....


Wednesday, April 25, 2012

Inspired By

TODAY IS THE DAY!  The BIG reveal of the project you have all been anxiously awaiting! Just go with my disillusions here! hehe.   The E-team is starting a new series that I think we will all enjoy and hopefully grow from!
This new blog hop is featuring our own personal journals as we embark on a journal that is
INSPIRED BY WORDS.

Visit each E-Team blog participant and leave a comment between today, April 25 to Sunday, April 29th for the chance to win a $25 eP gift certificate.  Winner's will be announced on the eP blog, Monday, April 30. PLUS!!  Join the E-Team in our journal adventure and post your journal cover on the eP blog by May 4th and we will pick 2 people to join us next month for the next journal adventure!!

ME!

I'm really excited about this new series!  I have been wanting to do an art journal for a while, but just never jump off the ledge. Add my love of inspirational words and this series has become the icing on the cake!  I'm so glad the Daisy snuck up behind me, and shoved! LOL!

I decided to make my own journal book instead of buying one.  My thought is that this will allow me to add what ever type of base paper or medium I would like to work with for that particular entry.  And I can add as many pages as I can fit my binding rings around! haha.  For my journal cover, I wanted to combine a couple of my favorite mediums; paint, metal and most recently, Ice Resin.  I started with a couple of Zutter book covers and painted a base coat of TenSecond Studios Verday paint in Bronze.  

Tips:  shake the paint well before applying.  The Verday paint is an acrylic paint that has actual metal particles in it.  You want to make sure that those particles get dispersed from settling on the bottom of the bottle.  

After letting the base coat dry for a couple of hours, I took a rough sea sponge and lightly dabbed more VerDay Bronze paint randomly onto the cover.  Immediately, while the paint was still wet, I misted with the VerDay Patina.  I put my Verday Patina into a cheap, fine mist bottle (like "hairspray" bottle), found  in the area where travel sized accessories are at Target.  
Let the Verday chemically react with the paint overnight.


After drying, I felt that I had gotten a bit heavy handed with the sponging/VerDay and had too much patina. I then just took my course sea sponge again, dipped it into a bit more VerDay Bronze paint, dabbed off on a paper towel and "dry" sponged randomly on the top of the covers to add more copper

Here is a picture, deliberately angled so that you can see all the wonderful metallic bronze shine


I have to say, I hated to cover up all this wonderful patina!!  LOL!  But cover it up I did!  Here is the cover to my journal.


I die cut various layers from the Tattered Floral die and from Spellbinders Carnation Creations from TenSecond Studio's Barn Red metal. I ran some of the flower layers through the Big Shot with an embossing folder and some layers I just hand doodled squiggle lines and others I used a decorative wheel tool on the metal to make patterns.  I then intensified the color with some alcohol inks 


I then shaped the flowers and applied a thin layer of Ice Resin to both sides of the individual layers using a small paint brush.  I recommend wearing gloves for this step.  It gets rather messy and you will get Ice Resin on your hands while trying to paint both sides of the petals.  I left a small portion of the bottom of the flowers unpainted so that I could set them down on my craft sheet to dry.  I was hoping that the Ice Resin would harden the metal enough that the flower petals would be more stable and would not bend as easily.  The Ice Resin DID help stabilize the metal.  I'm thinking that if I were to add another layer, it would make the metal really solid.   After letting the Ice Resin cure for a couple of days, I glued the layers together with Beacon's Glass, Metal and More Permanent Glue.  This is the first time I have used this glue and I was pleased at how relatively quick it set. I would highly recommend using it in a well ventilated room though! It has a bit of a strong odor!

The leaves were die cut using a combination of Spellbinders Carnations Creations and Foliage from TSS's Peacock metal.  


Here is my tutorial , with a video link for making flowers out of metal.  

And a close up of my "first" journal entry.  


The journal entry was typed on the computer, then each word cut out and sponged with Distress Vintage Photo ink.  I cut off a flap from a cardboard box, saturated it with water and peeled off the smooth layer of cardboard, revealing the rough layer underneath.  Distress Stain in Picket Fence was randomly applied.  The words were then attached using glue dots.  

The final touch was adding some swirling bling from Want2Scrap.  

I also finished the inside of the cover. 


I like to think that the TOTALLY different look is reflective of what I hope to accomplish with this journal.  No preconceived ideas.  No limits.  Just go for it.

I first covered the inside with Claudine's gesso.  I didn't really worry too much about how thick the coverage was.  Since I was totally impatient, I heat dried the gesso with my heat gun.  I then dropped random spatters of alcohol ink onto the gesso and hit them with a blast of canned air, dispersing the inks.  A light mist of Tattered Angels Glimmer Mist Tuscan Sun  was added on top.  After drying, I stamped the sentiment from Wendy Vecchi's I Am My Art set, using Archival Jet Black Ink.  Tip:  I would HIGHLY recommend that you do the inside of the cover before completing all the dimensional work on the outside.  It would make getting a clean, crisp stamped image soooo much easier and you will be able to avoid having to go over the stamped image with a black Sharpie.  Just sayin'.  

I'm really excited about this new adventure!  I hope that you will check out all the other E-Team's journal cover's and be inspired to join us!!


Saturday, April 14, 2012

Getting Inky

Hello?!!  Anyone still out there?!!

Yes, once again life has gotten in the way of crafting.  BUT!! I have some good news: I have been getting ink and paint all over my fingers today.

Of course, there is a slight downside to that:  this idea is not one that can be finished in a day. 

Or two days. 

Let's cross our fingers it doesn't go into next week. 

 I'm trying to let the creativity decide where this goes and when it is "finished".  Well, sort of.  It is for an upcoming blog hop with the E-Team.  But this is an idea that I have had brewing in my noggin' for a while.  It just took a little shove to get me started.

I'm liking it so far.  Paint. Metal, alcohol inks.  VerDay (more on that later).  Yep.  It's a new mixed media journey that I'm excited to start exploring.

 I'll share a little sneak peak with you.


Did I mention that I'm making a mess too?!! 

Stay tuned.  There is more to come soon!!

Wednesday, February 8, 2012

Tooting My Own Horn (but I added a tutorial!!)

Hey People! Hope your week has started out well!  The Oldest Kiddo's JV basketball team (which is coached by the Toad) had back to back games on Monday and Tuesday but walked away undefeated in league! WooHoo!!  Last night's game was an away game and the boys convinced the Toad that they should stop and eat on the way home to celebrate.  So, I'm a tad late this morning getting this post up!!

Back in August I was asked by Papercraft Inspirations Magazine if I would consider being a contributor for their Masterclass article in issue 95 (January issue).  Let's just say I'm amazed I was able to type Yes, thank you! with all my hootin' and hollerin!!


I actually had TWO cards published in this issue.  Today I'm going to share the Thinking of You card that was highlighted for the technique, versus the entire card.


Supplies Used:  Paper Gina K's Pure Luxury Ivory.  Basic Grey's 6x6 Sweet Threads. Stamps:  Hero Arts Stitched Frame. Inks:  Distress Ink Gathered Twigs.  Accessories:  TenSecond Studios Kiss Me Pink and Poison Ivy metal, mat set, Teflon refiner and decorative wheel.

And as an added bonus, the step by step!!


                                Using Stazon Ink, stamp your image onto the front side of the metal

Place the stamped metal face up on the acrylic mat and trace around the image with the Teflon refiner.  You could also use a stylus.


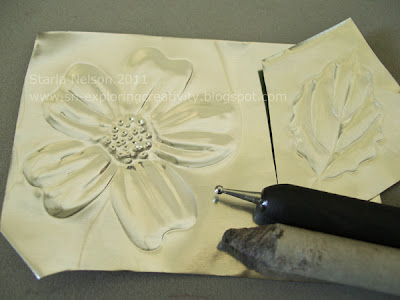
Place the metal stamped side down on the thin acrylic mat.  Use a paper stump and stylus (or ball and cup tool) to puff out the image

Still on the thin acrylic mat, use a decorative wheel to add detail


Use the pointed tip Teflon refiner to add "scribbles" between the petal lines

Cut out the flower and leaves (which were done the same up through step #3).  Using a sanding block (aka a burnishing block) lightly sand off some of the raised portions on the leaf to give highlights.  You could also sand the flower petals to highlight the "scribbles", but I wanted a more subtle texture, so I chose not to sand the flower.

Stamp stitched frame onto decorative paper.  Stamp sentiment onto scrap piece of Ivory card stock and distress edges with scissors or distressing tool.  Ink edges with Distress Gathered Twigs.  Adhere flower and leaves with strong glue dots, Humungo sticky tape or hot glue.

  A few notes on the flower:  I cut out two layers, but the bottom layer I did not add the decorative scribbles or lines.  I liked the look of the contrast between the layers.  You can gently form the petal leaves with your fingers to give shape to the flower. 

When adhering metal to metal, I like to use E6000 glue, Humungo Killer adhesive (link above) or a hot glue  gun.  I find that these work best for keeping the metal on metal adhered.  For adhering metal to paper, strong glue dots or the Humungo sticky tape work fine. 

That's it for me today!  I'll be back in a day or so with the SECOND card that was published!! (insert cheesy grin here_________).

'Till then..................

Wednesday, August 17, 2011

Stamping and Metal

Hey People!  Can you believe it is Wednesday already?!  The family has been running around getting the last details ready for the kiddos to start school tomorrow.  I would swear that we just got out for the summer just days ago!!

Have another tutorial to share with you today!  Beate, from Splitcoaststampers, asked me to do another Wednesday tutorial using metal.  Now, what is seen in the tutorial is NOT my original idea.  It is just my version of a very common technique!  Because I am lazy, I am not going to do the step by step here.  I'm going to send you to the home page of Splitcoaststampers for the link.  I will share the picture of the project and the youtube link here though!!


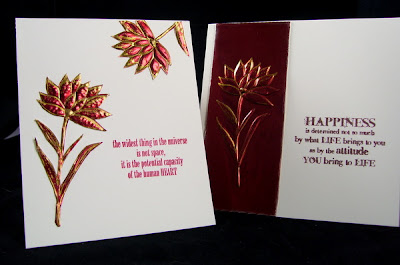
I used my stamped images two different ways today.  Both cards followed the stamping and metal instructions the same.  For my first card, I just cut out the stamped images after the backing paste had dried and I used them as metal embellishments for my card.  The second card keeps the stamped image on the metal panel. 

Here is the video of the technique


Ok.  Seriously.  I must have ticked off the technology gods sometime recently.  NOW Splitcoaststampers is also down, so I can't link to their site! 

What type of offering do you think the technology gods like?  Insert a looong, heavy sigh here_______.

Supplies:  Both cards use Pure Luxury Ivory cardstock as the base.  Both cards use Wendy Vecchi's Be Happy, Make Art stamp set.  Stazon Metallic Gold was used on TenSecond Studios Barn Red metal

If you are not inspired to emboss your image, just stamping on the metal is a fabulous look too!  I especially like the metallic Stazon on top of the metal.  Very rich looking!

I hope this inspires you to try combining your stamps and metal.  'Till then..............explore some type of creativity today!!

Friday, May 6, 2011

Art Parts Meet Metal


Are you ready for a RIDE?!!  Oh Yeah!! The E-Team is featuring the creative genius that is
Wendy Vecchi! Her theme is "Make Art!" and believe me, her line of Art Parts and stamps will get your creative juices flowing!

Of course, no E-Team Blog Hop would be complete without some wonderful prizes!!  Two random winners will be chosen from all the comments left on the E-Team blogs to receive 1 new Studio 490 stamp set, Art Parts Square & Rectangle Frame and some other fun surprises.

One more winner will be chosen on the eP Blog....you must leave a comment about your  favorite mother's day gift you have either received or gave to your  mom.  The eP Blog winner will receive a $25 voucher to eclectic Paperie to spend on goodies of your choice!

The E-Team
Starla (me!)

You will have from Friday until Sunday night to blog hop and leave your comments. The winners will be posted on eP Blog Monday. Good Luck!

P.S.  OOOOO!! Daisy is putting Wendy's stamps (aka Studio 490), both new and old on sale at 10% off.  Aaaand! Art Parts will also be 10% off.  NO EXCUSES!! Time to "Make Art!" as Wendy says!!

I decided that it was time for the Art Parts to Meet Metal.   

What a fun meeting!!  The two combined have LIMITLESS possibilities.  This is only one:

I think you can click on the photo to see the picture in a larger format

The Table.

I actually started with the flower pedestal table, which is made up of a variety of Art Parts. The flower was covered in TenSecond Studio's Dijon metal and embossed with TSS's Kabuka #18.  I then swiped some of Jenni Bowlin's Red Pepper paint across the metal and wiped it off with a damp paper towel.

The "stem" of the flower/table was done in Poison Ivy metal.  The vine was done free hand.  The base of the table is Dark Chocolate metal that I used one of the decorative wheels on and then sanded with the finishing block to remove the color from the raised areas. 

Sorry for the dark photo.  Had a HECK of a time trying to get a decent photo of all this metal without glares!!

The Vase.

I hunted through all my stuff and could just not find the type of vase that I needed to fit the idea of this project.  So, I created my own vase out of the Clearly for Art Blackout modeling film. 

 Hint:  make a template out of scratch paper first.  You can make adjustments to your template as needed, eliminating the trial and error on your modeling film.  Measure twice and cut only once!!

 I will admit that it was a little tricky to try and hold the film, heat it and mold it all at the same time.  May I recommend possibly the Plaid Hot Glue Gun Helpers?  I think that this is a MUST have on wish list!  I'm sure that my singed digits will be forever grateful too!!

The Flowers. 

The flowers were die cut from TSS's Dijon and Spiced Rum metal, using the Tattered Florals die.  Free hand squiggles and a small decorative wheel were used to emboss the metal.  Again, the finishing block was used to remove the color off of the raised areas to add texture. 


The flowers were adhered with hot glue to a couple of Art Part flower stems that had been painted with acrylic paint. 

The Leaves.

The small leaves are die cut using the leaf from Spellbinders Daisy Head out of TSS's Poison Ivy metal.  The large leaves were free hand cut from Whiteout modeling film. I painted both sides of the film with green acrylic paint then heated and molded the leaves.

The Butterflies.

The smallest black butterfly was made using a Martha Stewart punch on some Rock Star Black metal.  Free hand squiggles and a small decorative wheel were used to emboss the two different layers.  I used a bit of Clearly for Art Modeling film to suspend the butterfly above the flower.

The two larger butterflies were die cut from Peacock metal with my new mover's and shaper's Mini Butterflies. I used a couple of different Cuttlebug embossing folders on the meta, and sanded off the color with the finishing block.  The metal was attached to black modeling film by the body only.  After heating and molding, some self adhesive pearls were added.  The butterfly near the base of the vase was suspended from more clear modeling film. 


And the final project again


'Till next time...............I think Wendy says it best:

Make Art!