Showing posts with label Graduation. Show all posts

Monday, June 3, 2013

Are You Sitting Down?!!

No, your eyes are not deceiving you.  It is really yours truly, come back from the land of No Time for Creating!!

I always have to fight the urge to apologize and over explain my prolonged absences from posting on my blog.  Why do we busy mom's feel we have to apologize for putting Life before creativity or blog posting? I guess it is that secret compartment inside that holds that ugly word comparison.  We (okay, I ) see other creative mom's posting daily and it is hard not to think "well, so & so posted her six cards, the homemade 8 layer cake with step by step instructions, the final pictures of her living make over and her finish of the half marathon this week.  Why can't YOU make one measly card  and post it, say every other week????!!

I think I'm about to digress.

Let's just move onto the ACTUAL card I did manage to create, shall we?!!

School is finally out for our little school and with that I was in need of a graduation card for a senior girl.  Now, I am obviously SOOOO out of practice in making cards (just in case you missed the significant time lapse between posting dates) and this card went in a TOTALLY different direction than I had planned.  This particular senior girl, while all girl, is, was our little school's top female athlete.  I wanted a touch of feminine with a coating of athleticism.

I failed.  Miserably.  Somehow my vague idea of what I wanted turned into a girly girl card.  Which, is okay.  Just not what I had planned.

Sometimes, it is just best to go with the flow!! I really do like how this card turned out and while not what I had envisioned, it was still a touch of feminine without being over the top girly girl.

Before I share the card, I do have to giggle at how rusty my card making skills have become.  First,: it took me all day to make the card.  I will give myself credit for the fact that I spent quite a bit of time experimenting with the background technique until I got the look I wanted.

Second: may I strongly suggest that when making cards, one FIRST verifies that one has an envelope that FITS the card dimensions PRIOR to completing the card?!! Let's just say that the card was tucked into the envelope, but in no way, shape or form, was the enveloped sealed.  And the card was hand delivered. 

Finally: THE CARD


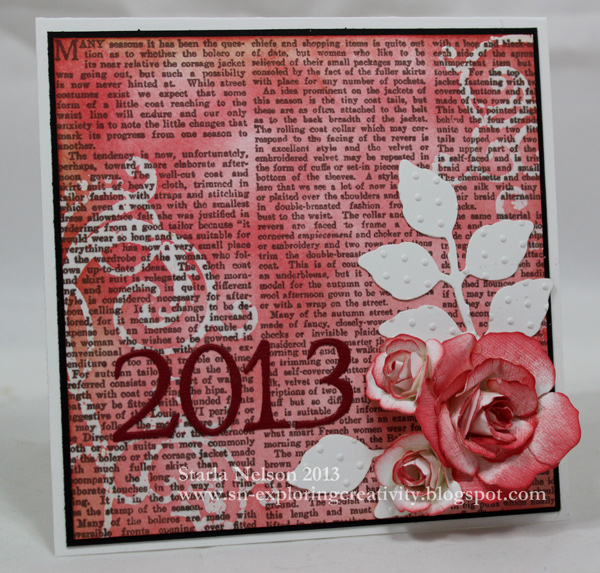
I made the background paper by stamping Cornish Heritage Farms 6x6 Vintage Text onto a 5x5 piece of Gina K's Pure Luxury card stock with Memento Rich Cocoa ink.  I then stamped the swirls (old set I've had in my stash fo-evah!) using Versamark ink and embossed with clear embossing powder.  Distress Inks in Barn Door and Fired Brick were sponged over the entire background.  Distress Vintage photo ink was lightly sponged along the edges.


I then die cut two flowers from three different sizes from  Rose Creations by Donna Salazar for Spellbinders from textured white card stock (I believe it is SU, but don't quote me.  I'm using my stash!!) and sponged only one side along the edges and partially down the petals.  


The petals were then shaped using a large stylus and a foam mat.


Beginning with the smallest flowers, the flowers were glued using a hot glue gun. Shaping of the petals were done by hand and a small stylus (you could use tweezers also, but I couldn't find mine!!)

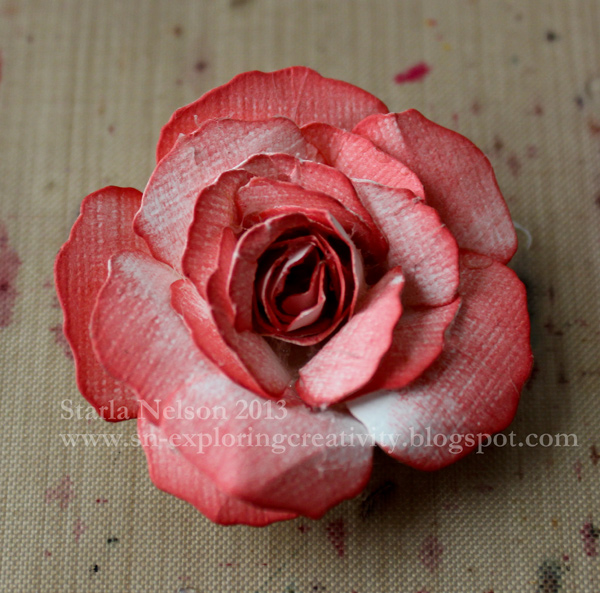

The smaller flowers were made the same way, except I used smaller variations of the dies and sponged only the edges of the petals. 

The leaves were die cut using Spellbinder's Foliage.  They were then embossed with the Swiss Dots Cuttlebug embossing folder.  


The numbers were die cut using Cuttlebug's Olivia alphabet dies.  


Well, that is about it for me today! I will make no promises that I'll be around more frequently this summer, as our schedule seems to be jammed packed and just as crazy as the school year was, BUT!! I will be back!! said in my best Arnold Schwarzenegger voice!! 

'Till then, enjoy the creativity!!


Monday, June 6, 2011

Graduation at the Movies

Well, after a week of my computer working without a hiccup, the dang thing is trying to give me heart failure by not wanting to connect again today!  BUT!! HAHA!  I fooled it!!  I just disconnected the thing and waited (somewhat) patiently for a bit and WAHLA!! it is working again!

But as I am not one to test fate, I am going to try and quickly post the last of the graduation cards that I made.  This one is my favorite.  It is TOTALLY nontraditional.  And, if I say so myself, perfect for the young lady for whom it was made.

J just so happens to be the daughter of my work out buddy (when our crazy schedules allow it, that is!).  For the Junior/Senior banquet, the Juniors hosted a Masquerade Ball on the Queen Mary.  In discussing the banquet, J happened to mention that the theme made her want to watch the Phantom of the Opera movie again.  So one evening, all of us "girls" got together and watched the movie.  And I discovered that the glamour of the old movies is not lost on today's youth.  J LOVES old movies. You know, the GOOD ones....starring Audrey Hepburn, Clark Gable, Lauren Bacall, Humphry Bogart.....

ANYWHOOS!!  I decided to make a card that brought out the glamour of the old movies.


(I seriously LOVE how this turned out!)

No stamping on this.  I used Graphic 45's Curtain Call as the focus for all the elements on this card.   Card base is  5 1/2" square piece of Vanilla Pure Luxury.  Graphic 45 Curtain Call Let's Dance and Leading Ladies was used for my background.  I then used my Classic Circle Nestabilities to cut the main images from Curtain Call and The Cinema from the same Curtain Call line.  The main images were mounted on SU's Real Red.  The year was die cut from Cuttlebug's Olivia from Real Red and adhered with Sakura's Quickie Glue Pen.

Probably my favorite element (besides the wonderful paper that is!) is the Film strip ribbon that was wound around and twisted among the main images.  I used Glossy Accents to hold it in place. 

Of course, I forgot to take a picture of the inside.  I used a strip of the fine polka dot paper along the bottom and then typed the sentiment on more vanilla card stock and mounted on Real Red.

Imagination will often carry us to worlds
that never were.
But without it, we go
No Where
Carl Sagan

Did I mention how much I like this untraditional graduation card?!  It's a style that I wouldn't make for everyone.  But I just knew that J would love it (and she did!!)

I'll be back (computer willing) in a day or so with the Thank You cards that I'm in the process of making for the Oldest Kiddo to send out.

'Till then..................try something untraditional in your creativity this week!!

Sunday, June 5, 2011

Still Marching for Graduation

Hey Peoples!  How is your weekend going?  We are still in the graduation mode here as we have family friends celebrating High School graduations this weekend.  I came up with another CAS (clean and simple) card that I can see being used again and again as the kiddos the Toad coaches graduate. 

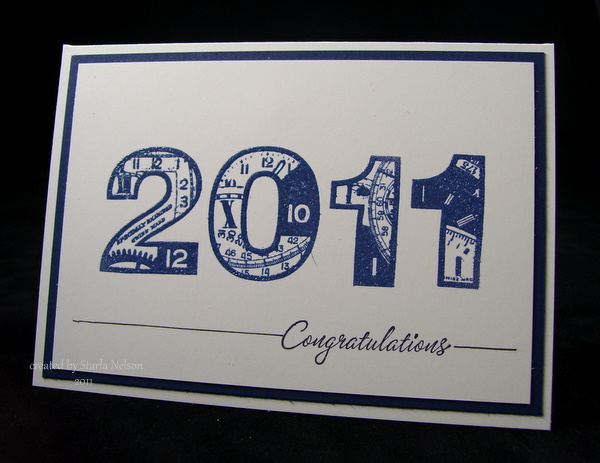
This is a very simple card to make in school colors and mass produce!  Base is 6 x 4 1/4" Pure Luxury.  SU's Real Red mat.  The numbers are from PaperArtsy (clocks 7 and clocks 8), that were stamped with VersaMark and embossed with red embossing tinsel.  In real viewing, the embossing tinsel adds a festive sparkle.  Pulled out the retired SU set of Warmest Regards for the sentiment and stamped using Archival Jet Black ink and then drew a line to weight down the main image. 

I made this also in the colors of another local high school for another family friend.  Got a little blip of ink mishap by the zero, but decided that the kiddo (being male) probably wouldn't notice or care.  I just wasn't up to redoing it, when in all likely, it will see the trash can!!


This still uses Pure Luxury for the base but substituted SU's Night of Navy for the mat.  I used Distress Chipped Sapphire ink and clear embossed. Sentiment is the same as above.

That's it for today!!  I'll be back in a day or so and share a very nontraditional graduation card! 

'Till then.......................enjoy the start of a new adventure today!

Friday, June 3, 2011

Graduation, CAS

I am now officially the mother of a High School student. 


Just ignore that anguished wail of a mother who can do nothing to stop her babies from growing up.

Sigh. Ok.  I'm not going to dwell on the fact that my little boy is quickly becoming a young man.  A young man who received an academic award for a GPA above 3.5.  A young man who also was pinned by The Toad for the Junior National Honor Society (Sorry.  Had to brag just a bit!!  What else is a proud mama to do?!!) A young man who is now officially 5 inches taller than me.  Who has a wing span longer than The Toad's.  A young man who borrowed his father's shoes for graduation.  A young man who is is sprouting hair above his upper lip (really?!!)

I REALLY need to stop thinking of all this or I am going to need some serious medication to get through the next four years.  This growing up thing was NOT in the "What to Expect" books that I read. 

Or maybe I just skipped that chapter thinking it wouldn't happen for a VERY long time. 

Reality has a way of smacking you right between the eyes!

******

OK!!  I'm sure that none of you stopped by to listen to me whine about my kids growing up too fast.  So, I'll put that all aside to share the card that I made for the kiddo's classmates.  Since I was making 22 of these, I tried to keep them fairly clean and simple. 


Base:  4 1/4" Pure Luxury.  Mat:  SU's Real Red.  Die cuts of hat and diploma from QuicKutz.  Not quite enough detail to suit me, so I did some shading with Copics and a Inkssentials opaque pen.  Used my Scor Buddy for the embossed edge.  Stamp is from SU (I think it is from All Year Cheer). 

I'm off to make some more graduation cards.  I need 5 more before the weekend is done!  YIKES!

'Till then.................enjoy the moment.  They tend to fly by before you know it!

Saturday, June 5, 2010

Graduation Continued....

Hey Peoples! School is officially out and the heat is suppose to climb to the upper 90's today, uggghhh!!  I REALLY don't want to turn on the air yet!! While I'm ready for summer, I'm not ready for the heat!Trying to crank out some neglected chores while it is still somewhat cool!

I thought I'd drop in real fast and share the general idea of the 8th grade bags that I made up.  For those of you who might have missed the introduction to this project, here is a quick recap.  The 7th grade class has a few responsibilities for the 8th grade graduation.  One of those jobs being providing gift bags for the 8th graders to place all their cards and such in at the reception.  I was asked if I would take on this job and was given 21 LARGE glassine bags (approximatley 14"x 16").  This is what I came up with:


I wish I could tell you what the name of the die cut letters are! I borrowed them from friend and she did not have the sample sheet in the folder (which, I could have used as I used some of the letters "upside down".  Example:  The "B" is suppose to have the small loop on the bottom...but who knew?  Who cares?  snort) I do know they are from Quikutz.  I die cut the names using my Big Shot out of Brazzil paper (again, I did not note the shade.  I'm thinking it was Pomegranate.  I really need to pay more attention to those detail for you all!!) The letters were adhered to the bag with Art Glitter adhesive.  This stuff dried FAST and clear and is quickly becoming my favorite glue. 

The graduation cap is the same one that I used on this card: I started out with this die from Ellison                                                                                          
                                                            
I didn't like the way the tassel portion looked on the clear bags so I made my own top and adhered it with dimensionals to give it a more realistic look. 


I made the tassel from some embroidery thread and used some jewery dohickies to close them off (like those technical terms?!). The tassels were attached around a black brad and a thin strip of red liner tape (1/8").  The year was made using TenSecond Studios Bingo Mold and some Rock Star Black metal.  I cut out each year and filled the back with some embossed metal backing paste which helped prevent the metal from bending so easily and gave me a  place to adhere glue dots to!

The little diploma's were made out of SU's Very Vanilla cardstock.  I stamped "congratulations" on the inside (because I just know that at least ONE kid will untie the thing to see if there is anything inside! hehe) and tied with some black ribbon.  The diplomas were attached using a glue dot behind the ribbon.

I still need to share the card I made for my oldest's b-day LAST weekend!!  But I'm going to spread out the goodies, LOL!! 

Thanks for dropping by again today!!  Remember to take time for some type of CREATIVITY in your day!!


Wednesday, June 2, 2010

Tassled Congrats

Hey Peoples!!  Anyone else going crazy with the last hoopla days of school?!!  Fairly quick post (because we all know I can't keep from babbling on and on) today. 

Needed a graduation card and the sketch challenge on SCS today was the perfect jump start to get it done.


Here is my take:


I flipped the sketch, putting layer 4 at the top and sttrrreeetched the layout to a 6x6 card.  The graduation cap is a bulletin board die that I modified so that I could hang a homemade tassel from (you'll be seeing more of these when I post the 8th grade gift bags!! This is an extra one).  The year was made using TenSecond Studios Bingo mold andRock Star black metal.  I filled in the back with some embossed metal backing paste to help prevent the metal from bending so easily.  The paste also gave me a hard surface to attach the year to the tassel. 

The colors are our school colors.  The red paper is Brazil (hmmm.....can't remember what shade, sorry!!) and I layered the b/w vellum swirls over some Georgia Pacific 110# paper. The "Congrats" are some OLD alphabet stickers that I have had in my stash from scrapbooking days.  A CAS with some POP!! 

Thanks for dropping by again today!!  I'm off to get some more items check off the ever growing To Do List!!  Remember to take time for some CREATIVITY in your day!!