Showing posts with label PaperArtsy. Show all posts

Sunday, June 5, 2011

Still Marching for Graduation

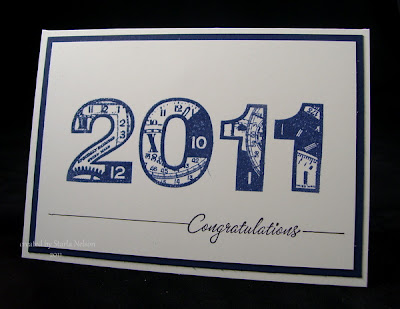
Hey Peoples!  How is your weekend going?  We are still in the graduation mode here as we have family friends celebrating High School graduations this weekend.  I came up with another CAS (clean and simple) card that I can see being used again and again as the kiddos the Toad coaches graduate. 

This is a very simple card to make in school colors and mass produce!  Base is 6 x 4 1/4" Pure Luxury.  SU's Real Red mat.  The numbers are from PaperArtsy (clocks 7 and clocks 8), that were stamped with VersaMark and embossed with red embossing tinsel.  In real viewing, the embossing tinsel adds a festive sparkle.  Pulled out the retired SU set of Warmest Regards for the sentiment and stamped using Archival Jet Black ink and then drew a line to weight down the main image. 

I made this also in the colors of another local high school for another family friend.  Got a little blip of ink mishap by the zero, but decided that the kiddo (being male) probably wouldn't notice or care.  I just wasn't up to redoing it, when in all likely, it will see the trash can!!


This still uses Pure Luxury for the base but substituted SU's Night of Navy for the mat.  I used Distress Chipped Sapphire ink and clear embossed. Sentiment is the same as above.

That's it for today!!  I'll be back in a day or so and share a very nontraditional graduation card! 

'Till then.......................enjoy the start of a new adventure today!

Friday, May 27, 2011

QUICK!! Another Glimmer of Hope (and a card too)

Do you think that computers can be possessed?  I'm seriously thinking that mine is.  Refuses to connect for, what, a week?  Then, this afternoon, The Toad decides to try it and ABRACADABRA!  The dang thing works.  I REFUSE to think that the stupid thing was protesting at my demands for non stop blog hopping!! 

Of course, tomorrow will probably bring back the "refuse to connect" story.  BUT!  In the meantime, I thought I'd share a quick card that was made a couple of weeks ago for the gal that does marketing for work.


This gal is a rather creative and crafty gal herself, so it was decided to get her a gift certificate from our local scrapbook store.  The store puts the  certificates in a clear cellophane bag with pretty tissue paper and ribbon.  I was inspired by the tissue paper to make all these different punched flowers from various dies.

You are just going to have to trust me when I say that these resemble the flowers on the tissue paper.  It would seem that once again, SOMEBODY was so flustered trying to get a half way decent picture of the card before running out the door for the lunch party, that she forgot that important photo of the gift packaging along side the card!! 

This card uses so many different dies and punches!!  The base is Pure Luxury (but of course!) in a 5 1/2 square layout.  I believe the bright green is SU's Green Gable or Green Galore.  The largest flower was made using PaperArtsy's grunge flower #2 and 3.  Spellbinder's Peony dies and Snowflake were also used (EEEAAAKK!! My computer is starting to act up....no more links! Sorry!! Just going to try and get this posted QUICK!!).  The circles were made from various circle punches. 
Papers:  SU's Real Red, Tempting Turquoise, Green Galore or Gable Green (which ever one it was!) and Tangerine Tango. 

(How's that for short and to the point?!!)

I hope you all have a safe holiday weekend!  Remember to take a moment and remember those who have sacrificed so much in serving our country. whether in active duty or by being a family member of one serving!

A very sincere THANK YOU to all of you who are or have served!!

I'll be back (hopefully!) with a b-day card and graduation cards in the next day or so!! 

'Till then.................explore some creativity!!

Wednesday, February 16, 2011

One Love

How in the world did we get to Wednesday already?! I think I'm stuck somewhere in Thursday of last week!!

Anyhoos! 

I needed to make a wedding card for a "celebrate our marriage" open house that is this weekend.  The invitation was fairly simple, the information is typed on white, with a vellum " triangle "gate" fold that is held together by a simple embossed seal.  I knew I wanted to include the vellum element somehow.  While rummaging through my embossing folders, I happened to look up on the top of the shelving where I "store" cards and other projects that I have not found a home for yet.

Bingo!! 

I decided to CASE (copy and share everything) myself.  Hehe.

Yes, I used the dreaded PINK color again!!  I'm thinking that I might be running a fever!

The original card was made waaaaay back in July, '09, as a "Dare to Get Dirty" challenge on SCS. This would be special challenges brought to Fan Club members by current and past Dirty Dozen members.  I even considered just trying to change the original sentiment to a more "newlywed" sentiment and giving that card.  But there was a couple of problems with that idea.  A) The base of the original card was rather flimsy, in my opinion.  I am TOTALLY in love with the thickness of the Pure Luxury card stock for my bases of cards.  Especially cards that have some extra elements and layers to it!  B) I wanted a softer color of roses that fit the theme of the couple's invitation better.  C)  I totally tore the card up trying to remove the flowers to replace the sentiment!

The layout came from a challenge sketch by Cindy Hafner.  The base is a 5 1/2" square of Pure Luxury.  The background squares use SU's Pink Pirouette and Basic Black as a mat for the Cuttlebug embossed squares.  The sentiment was computer generated and printed out on more Pure Luxury.  For once, my printer accepted this thick paper!! But, I will admit to printing it out several times on printer paper and even Georgia Pacific before trying the Pure Luxury.  The Pure Luxury also has a beautiful, true WHITE to it! I used my Spellbinders classic and scalloped circle dies to cut the sentiment layers.  Light sponging with Pink Pirouette was done along the classic circle border. 

Now for the roses.  Ahhhhh!  Can I just say that these turned out sooo much better than I had thought?!  I initially tried to make the rolled roses, like the original ones, out of vellum from SU.  Insert a heavy sigh here________.  Vellum tears.  And it does not hold the rolled shape like paper does.  After several frustrating attempts I gave up.  I decided to try another idea.  First, I inked up some vellum with Distress Ink in Worn Lipstick.  Then I used my Grunge Flowers #2 and #3 from PaperArtsy and cut out several flowers, some from the pink and some from the plain vellum, using the smaller of the two dies.  I then made the roses using a tutorial from Leandra (The YouTube link is on her side bar).  The smaller roses were made with the same die.  I just did not make as many layers!  All the layers were adhered using Glossy Accents. After all the flowers were dried, I spritzed them with Tattered Angels Glimmer Mist in Pearl.


OOOO!! Just the perfect shimmer!!

The roses and leaves were adhered using more Glossy Accents.  The pearls and gems were recycled from the original card, as that one is now a gonner!

In all honesty, I think I like this one better than the original! Even if it does use PINK! haha  The vellum roses just add that something "extra". 

I've already got my desk area cleaned up and have started on the next project!! Yep....you'll want to tune in on Friday, February 18, for the next E-Team adventure!!  

'Till then.......................create something new, or better yet, recreate something that you enjoyed before.  You just might like the second round even better! 


Sunday, January 23, 2011

The Future

How's the weekend going for you all?  While cruising through blog land yesterday, I came across Moxie Fab World's Grey is the New Black challenge.  And no, this will not be entered in that challenge!!

Why is it, that I own multiple ink pads in various shades of blue, red, brown, yet lack any grey ink pads?!! Actually, after I had stamped the main image of this card, I remembered that I did own ONE grey ink pad....Adirondack's Slate.  So I used that on the sentiment.  Which I stamped crooked despite using my stampamajig. 

Sigh. 


The base is a 5x5 piece of Pure Luxury card stock from Gina K.  The stamp is from PaperArtsy.  I stamped the image using Encore Silver metallic ink and embossed with silver embossing powder. There is light shading using my copic marker along one side of the cage and bottom to "ground" the image, which does not show up in this photo at all.  

 I then stamped the image again on a scrap piece of SU's Riding Hood Red and cut out the little birds and clear embossed them. I used a Quickie Glue pen to attach them over the first bird layers.  I then inked the sentiment (from the same set....Hot Pick 1004EZ) with Adirondack Slate and then used my SU Ruby Red marker over the word "one" to make it stand out. 

In all honesty, this card did not meet the expectations of the design idea in my head. I think it is the silver embossed cage. I don't know. Somehow, it just lacks the look I was going for. I may just have to redo it again since I have now found my grey ink. BUT! I made it, I posted it. I'm moving on from it!

Till then................remember, not all creative journeys are winners, but you will have a better idea as to which road needs some work if you are willing to travel.

Sunday, October 3, 2010

Everything is Coming up Roses

Hope everyone is having a fabulous weekend!!  Still having my creative quandary, but I thought that today I'd share the beginnings of another project that I'm working on.  I'm now having to wait for some more supplies (sigh....) but I just felt the need to prove that the mojo is flowing....it's just caught up in some mud and weeds right now.

This summer my Aunt and Uncle celebrated their 50th wedding anniversary.  I was unable to attend the celebration party, but have had an idea floating in my head for some time.  Decided to jump off the bridge and start putting it together yesterday. This is the beginning of my Golden Roses


Aren't these just GORGEOUS?!! These were made using TenSecond Studio Metal in Gold Nugget and Pearl, a pointy, refining tool, and some wheels, hummungo tape, design paper from TCP Studio (found at my LSS), PaperArtsy Hot Pick 04, coordinating die and Stazon Gold Metallic Ink.   I used Leandra's tutorial on the metal flowers that can be found on her side bar of her blog


Here is my sad attempt at a more "artsy" photo:


I made these late last night and the lighting is TERRIBLE in my craft area, so I did not take "how I did it" pictures.  I PROMISE I will take more step by step pictures on the next go around (hopefully, in the next day or so!!).  Unfortunately, I REALLY need to step away from my craft area/computer and spend some quality time cleaning at least one layer off the various surfaces of what used to be my house. 

Till then~~Thanks for dropping by and remember to add some creativity into your day!!