Showing posts with label family life. Show all posts

Monday, May 5, 2014

The End is Upon Us

The End of the YEAR is quickly approaching!!

Oh wait!  You didn't think I was referring to anything else did you?! (wink).

This time of year gets CRAZY with having 3 teen age boys. Baseball is cramming in 3 games a week. Senior recognition for baseball that will require me to go through 680 pictures multiple times in order to put together photo collages for the senior boys and their coaches.  Teacher's are cramming in as many last quarter  projects that might be possible to complete without parents hiring a team of hit men. Music performances are doing double services at the local churches, not to mention the spring concerts that will be upon us soon.  Award banquets.  Teacher appreciation days. School golf tournaments.

A family wedding to attend.  Oldest Kiddo's birthday coming up.

And let us not forget graduation and the party announcements that still need to be made up and sent out. And graduation cards for classmates.

Cloning. That may be the only answer to get all of this done.  

To add the final cherry on top, the Youngest Kiddo decided that it would be the perfect time  to break his wrist.

The Toad suggested he get a white cast so that I could custom paint it for him.  The first idea was to do the Terminator look with mechanical parts bursting out of the skin.

Uhhhh.  Nope!! It would seem that when mom has not drawn or painted in a loooong time, such skills required for that type of detail are no longer an option.

And yes, I did try.

Next option, Ironman.  As simple as this should have been, it took me several tries.  This cast has more paint on it than the Sistine Chapel.  


You may have noticed that I didn't share the top of the cast.  It would seem that became my nemesis. While it doesn't look bad, per say, it just doesn't look as good as the palm.  It looks like it went through a battle to get painted and it won.  Oh well!! The Youngest Kiddo has informed me that I'll have the chance to have another go at it in a couple of weeks.  Yes, this Kiddo will have the pleasure of multiple casts as he fractured the scaphoid bone in his wrist, which just so happens to have the poorest blood supply.  This meaning more x-rays in a couple of weeks to make sure it is healing.  

It goes without saying that further posting will be sparse over the next couple of weeks!! I hope the month of May finds you with plenty of time for creativity! Enjoy a few extra moments for me!!

'Till next time......................


Sunday, June 26, 2011

The Lazy Days of Summer

Do you remember when summer time meant sleeping in until the bright rays of the sun pulled at you stronger than the comfort of your bed?

When days were spent running around the neighborhood with friends and cousins until dinner time?  Then the evening games of tag, hide and seek, with special effects of "Daddy shot all the bears last night, there won't be any bears tonight", and the screams when the "bear" would jump out and chase you all over the yard while screams of terror/delight filled the air?

The days where you had so much time that you could finish not one, but TWO books in a day?

Those days no longer exist. At least not in this household. 

In the three weeks since school has been out, the Oldest Kiddo has participated in basketball boot camp, volleyball camp, started summer league basketball and will start cross country tomorrow.  The youngest Kiddo, having the fate of being born second, hangs out in the gym all day with his older brother or in The Toad's office while I'm covering vacationing therapists at work.

There has been no lazy days of summer here.  But as a family, we have been enjoying the lazy EVENINGS of summer.

Ice cream bars and fruit soup for dinner. 

Windows open to the cool evening breeze (just a few more weeks of that PLLLEEEASE!!) while as a family we watch movies all night long.

Obviously no creating has been going on. 

Except the creating of memories.  I've decided that the creating of memories outranks the creating of cards or such right now.  Not to say that I won't be doing any creating at all over the next month or so.  I NEED to create for my own sanity.  I'm just giving you all a heads up that the creating might be a bit more sparse than usual over the next month or so.

I want my kids to look back and say "Do you remember when we would sit around eating ice cream bars and watch Myth Buster's all night long?"  Those summer evenings were the best"

The lazy days of summer might be jammed packed.  But the lazy evenings of summer still exist. 

Till then...............enjoy the evenings!

Thursday, December 2, 2010

A California History Lesson

Oh MY!!  Another week flying by bringing us closer to Christmas.  And me further away from getting all the items on my list done!!

Earlier this week, my youngest Kiddo began what is a tradition for thousands of 4-5th grade students in California.  The tradition of learning of the history of the 21 missions that are along the El Camino Real, or the Royal Road.  The missions stretch from San Diego to Sonoma.  While the first two missions established (Mission San Diego De Acala, 1769, and Mission San Carlos Borromeo De Carmelo, 1770, were a substantial distance apart, the chain was soon filled in with stations that were only about a day's ride apart.  This allowed the already established missions to supply manpower, livestock and supplies to fledgling colonies. 

Mission San Juan Capistrano was the seventh mission, founded twice; first by Father Lasuen on October 30, 1775, then by Father Serra, who became known as the Father of California, on November 1, 1776 (which makes this mission as old as our country). 


While some of the original brick and adobe has had to be restored, this area is as it was over 200 years ago.


Construction took over 10 years, and it had been in use for only six when the earthquake of 1812 struck, destroying the cross-shaped, elaborate stone church (the largest structure this side of the Mississippi at that time) and killing over 40 worshipers.  Also contributing to the history of the mission were fires, epidemics, droughts and an attack from the pirate Bouchard.

This is just one of the elaborate silver pieces that were used at the mission for worship (the awful lighting and glare would come from this being displayed in a dark room and in a glass case). When the mission was attacked by the pirates, the families of the mission hid the treasures, some being buried, some taken and hidden in their homes, until they thought it was safe to bring them out again. The glare right above Christ's head is actually a bullet hole. There is no record as to how this piece got the hole.  Or the story behind it.  My imagination loves this type of thing!!

This was a "small" chapel that was used for the private worship of the priests and the first followers.  The Golden Alter was made in Barcelona in the mid-1600's and was given as a gift to the mission in 1906.  It was delivered in 10 crates with 396 puzzle pieces!!  No one knew how to put it together.  The Father laid it out in the quadrant and by chance, someone said they had seen an similar alter in their travels.  The alter was  pieced together from a memory.

The dark pillar on the left side of the picture would be the pulpit that the Father had built after the alter was done and he realized he had no place to preach from.  The "crown" over the pulpit is actually a sounding board.  When the priest would stand under it and give his sermon, his voice would bounce off the "crown" and propel to the worshipers.

Notice the different ceiling heights in the first picture.  The area over the seating is lower than the alter area.  It would seem that when the alter was near completion, the workers realized that the height was higher than the current ceiling.  Solution:  raise the roof, literally just inches above the top crest.


 Notice the paintings around the niche.  The natives would paint fresco decorations along the walls and ceilings, using symbols from their own beliefs to make the worship area (and living areas) "beautiful". 


A niche over an outside door painted with a religious symbol.


This is the gate to the courtyard to one of the side doors that leads to the only original room left of the  Great Stone Church. 


Bells across the same courtyard.  These bells are still used today for special occasions.  Bells were very important to the missions. They were the form of communication.  Depending on how they were rung, the community knew when they were called to worship, when there was an attack being launched or other codes.


What is left of the Great Stone Church


This is just off to the right of the church. The bells are the ones seen previously in the courtyard photo.


This is corner wall between the wall that has the bells and the Stone Church wall.


This is the original center quadrant fountain of the mission.  Of course, the quadrant is now a lovely garden, but originally would have been used for different activities needed for daily living. 


My parting shot of the bell tower in the quadrant

I personally love history and found the opportunity to visit this piece of history fascinating!!  I hope you enjoyed a bit of California history!! I would like to acknowledge the book California Missions by Londie Garcia Padelsky.  It is a book I have in my home collection and was used to refresh my memory of some of the history details.


Tuesday, November 23, 2010

Still in the Kitchen

Hey Peoples!!  Are you all ready for Thanksgiving?  Lucky me, my mother in law does all the cooking for Thanksgiving.  Which means I don't have to have my house clean (yet).  And I don't have to stress on whether the turkey is moist enough.  Or if there is enough dessert. 

But I am requested to bring one recipe every year (and just so you don't think I'm a total slacker, I usually bring some type of dessert too!!).  Many years ago, I found this recipe in a book titled The Little Book of Christmas Joys.   This is a FAVORITE with all the family. It's quick, easy and soooo yuuummy!!  In fact, this was made last Friday for the oldest Kiddo's Thanksgiving feast.  And it will be made again tomorrow for our dinner on Thursday.

Rosemary's Cranberry Salad
Ingredients you will need

Pretend there is some OJ in the picture

Wash and sort your berries.  I ALWAYS have a few of these bags in my freezer.  One:  if there is a shortage, I have my supply for the year.  Two:  this would make a WONDERFUL summer salad too!

Can I just share the fact that I "borrowed" this colander from my mother when I had my first apartment?  She passed away 13 years ago from breast cancer.  I love this.  It is a daily reminder of her. 


Drain the pineapple, reserving the juice

Hmmmm....Now that I'm on a nostalgia kick, I believe this little strainer was "borrowed" at the same time.  How the heck did my mother ever cook after I moved out?!


Peel all but one orange and cut them all up.

Ya know, my mother must have had one heck of a shopping spree after I moved out.  The knife is an old stake knife that I borrowed too.  And, huh.  Whadda ya know.  That cutting board was hers too. 

The funny thing is, my mother was not known for her cooking.

Grind the cranberries and oranges in a food processor or food grinder.


Add the drained pineapple.  I grind it again.  Just in case someone doesn't care for the bigger chunks of pineapple.  Also grinding is easier than trying to stir in the bowl!!


Add the sugar.  The recipe (to follow) calls for 1 pound of cranberries.  I guessamate.  Sooo, I'm generous with my cups of sugar! 


Yep.  I just throw this in the food processor too.  Easy to make sure the sugar is blended well.  I fill my processor literally to the brim!!


Combine OJ and the reserved pineapple juice.  Sprinkle some unflavored gelatin on top.  Heat until it is completely dissolved. 


Add the gelatin to the fruit mix.  Believe it or not, I do NOT do this in the food processor.  By this time, I'm pushing the limits on having a major explosion of cranberries all over my counters.  I pour it into the serving dish I am going to use and then add the gelatin and mix it thoroughly.  (This would be the time to fold in the pecans if you are using them.  While I like pecans, my family prefers this recipe without them)

Chill until set. 


Rosemary's Cranberry Salad.  Yield:  16-20 servings

1 pound cranberries                                                        2 cups sugar
4 oranges, one unpeeled                                                 1/2 cup orange juice
1 15-ounce can crushed pineapple                                  3 envelopes unflavored gelatin
    packed in juice                                                           1/2 pound pecans (optional)

Wash and sort the berries.  Peel all but one orange and cut up all of the oranges.  In a food grinder or food processor grind the cranberries and oranges.  Add the drained pineapple, reserving the juice.  Stir in the sugar and mix well.  In a small saucepan combine the reserved pineapple juice and orange juice.  Sprinkle the gelatin on top and stir.  Heat until the gelatin is completely dissolved.  Add the gelatin to the fruit mixture.  Fold in the nuts (if using). Pour into a pretty dish (the recipe actually says to pour into a greased 3-quart mold.  Personally, I could never get the thing to release pretty.  So I opt to use a pretty dish).  Chill until set.  ENJOY.

I would love to hear of any favorite family recipes that you might have!  I am ALWAYS looking for something new to add to our family gatherings (or just week day dinners!)

I have some other CRAFT projects in the works on my desk just waiting for me to finish.  I made the mistake of going into the playroom yesterday.  Let's just say I now have a truck full to take to the local thrift store, a garbage can full of trash, a recycle can full, and a pile to give to the school.  Aaannnd, we still have one more corner to go!! Good grief!! Was this ever a job long over due!!

Till then.....remember~~exploring creativity is a journey that can be found in so many areas.  Try something new today.  Whether it be in the kitchen, your craft area or on the computer.  ENJOY


Sunday, November 21, 2010

Pioneer Woman....

I am NOT!!  LOL!  I just love Ree Drumond, aka The Pioneer Woman. I love how her sense of humor comes out in her writings.  I love her photographs of life on the ranch.  They remind me of growing up in Wyoming. With real cowboys and wild mustangs too.  I love how she showcases her cooking and does not apologize for using fat, beef, and the yummy stuff (and the fact that she takes all the photos herself).  To me, she is personable.  Not afraid to tell of her so-called faults and mistakes.  I am incredibly envious of the lodge kitchen and her own kitchen.  Both of which I envision to be larger than my entire house. 

But I thought I would try and channel her with today's post.  Let's just say that there are MANY miles between California (me) and Oklahoma (Ree). 

Remember the Denmark Paper Doll the youngest Kiddo had to make?  Well, along with the fact report and the paper doll, comes the "make an ethnic dish" from that country to share at the Ethnic Feast.  Once again I'd just like to thank Mrs. M. for assigning the Kiddo a country that uses common, off the shelf ingredients.  Mind you, all the food made also has to be vegetarian or made with meat substitutes.  Just to add to the fun!!
After some research, the Kiddo and I settled on Danish Peppernut Cookies to make. 

Ingredients you will need:


In a large sauce pan mix the sugar, corn syrup, milk and shortening. 


Bring to a boil and after it cools, add the spices and baking powder


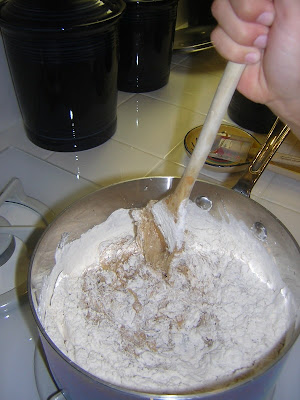
Stir in the flour


Chill for a couple of hours.  Roll out a 1/4" rope on a surface dusted with powder sugar.  Ignore the part of the directions that say to cut the cookies in 3/8" segments and bump it up to 2" segments


Also ignore the instructions that say to bake on greased cookie sheet and use parchment paper.  That way you don't have to wash the cookie sheets!!

Sprinkle with some more powder sugar


And dress the Kiddo up to look like a darling Danish boy!!


I must say that these turned out pretty yummy!! They are a "hard" cookie. Like a biscotti. Or, that is how ours turned out!! I think they are designed to dunk in coffee or hot tea.  Maybe someone of Scandinavian decent could let me know.  Personally, no one in this family has had any problems just munching on them!!  The cardamom and anise give these a nice flavor. 

Danish Peppernuts

Ingredients
3/4 cup sugar
2/3 cup dark-colored corn syrup
1/4 cup milk
1/4 cup shortening
1 teaspoon anise extract
1/2 teaspoon baking powder
1/2 teaspoon vanilla
14 teaspoon salt
1/4 teaspoon ground cinnamon
1/4 teaspoon ground cardamom
1/4 teaspoon ground cloves
3-1/3 cups all-purpose flour
Sifted powdered sugar

1.  In a large saucepan combine sugar, corn syrup, milk, and shortening.  Bring to boiling.  Remove from heat and cool about 15 minutes.  Stir in anise extract, baking powder, vanilla salt, cinnamon, cardamom and cloves.  Stir in the flour until well mixed.  Cover and chill about 2 hours or until easy to handle. 

2.  Divide dough into 24 equal portions.  On a surface dusted lightly with sifted powdered sugar, roll each portion of the dough into a 1/4 -inch thick rope.  Cut into pieces about 3/8 inch long (or 2 inches like us!).  Place 1 inch apart on a greased cookie sheet (or use parchment paper)

3.  Bake in a 375 degree F oven about 10 minutes (5-7 min was better in my oven) or until lightly browned on bottom.  Immediately remove and cool on paper towel (once again, I just used my cooling racks).  Makes 8 cups of cookies (thirty-two 1/4 cup servings)

*****************

Now, I don't want you to think that I never take pictures of the oldest Kiddo.  He is at the age where he really doesn't care to pose for his silly mother.  But I did manage talk him into letting me take this quick photo of him kinda dressed as an Indian for his 8th grade Thanksgiving feast.  Basically, the kid wore brown shorts, a light tan t-shirt turned inside out to hide the graphics.  I kinda/sorta made an arrowhead he had into a necklace and a cheesy headband.  "Mom.  Could I be one of the Hopi gods tomorrow.  Me:  Dude.  It's 8:30 pm. Just how am I suppose to come up with an elaborate costume NOW?  "Yeah.  I  guess.  Can I have a large feather that looks like an eagle feather in the headband?  Me:  Bud.  It's 8:35pm.  I have some chicken feathers I think.  You get chicken feathers.  Deep heavy sigh...


Love, The Pioneer Woman Wannabe.  (snort)......


Thursday, November 11, 2010

Kiddo Creations

Hey People!!  Not sure how it got to be Thursday already, but I'm glad that this weekend is almost here!!  I got a BIG BOX OF GOODIES and I cannot WAIT to start playing with stuff!!

There has been creativity going on here.....just not mine.  The Kiddos have had projects due and once again, Mom's "junk" adds those little "extras" that kick up the projects up a notch!!

First up:  Oldest Kiddo had to make a project from the Renaissance era.  Of course, being a "manly boy" he went for a weapon of war.  A siege tower to be exact. 


I'm not sure why I don't have any pictures of the actual work of creating this.  Heaven knows, all the Popsicle sticks, glue, felt, etc., were on my kitchen table for two weeks.  My best guess is it is due to the fact that this was a project that I had very little to do with.  The Toad helped the Kiddo design this and they worked on it together.  Sometimes while I was at work.  Or while I was making supper.  Whatever.  I failed to document the actual creating. 

This picture does not show the cool details on this project.  Like the drawbridge that drops down.  Like the floors between the three stories that have these itty, bitty little ladders that lead to the next floor.  I really should have taken more pictures of the project itself. But I'm lazy.  And it is 7 am and my hair is drying all funky because I'm trying to post instead of taking care of my looks.  Ahhhh!!  The sacrifices one makes for her blog followers!!  

Hehe.

Next project.  Each year at our little school grades 4-6 have an "Ethnic Feast" instead of a Thanksgiving Feast.  Each kid is assigned a country and must do a report of some type giving details of their country.  My Kiddo was assigned Denmark. Thank you Mrs. M. for not assigning my kid a country I don't even know how to pronounce.  In addition to a "fact sheet" on Denmark, the Kiddo had to dress this paper doll in the ethnic costume of his country.  


  I now know that I need a Big Bite.  My cropadile did not reach the center of this paper doll to place the jumbo eyelets that the kid was using as "buttons" on the vest.  Actually, the Kiddo is probably glad I don't have a Big Bite.  He had waaaaayyyy too much fun pounding the eyelets with the hammer.  Let me confess here that I have TOTALLY forgotten how to set eyelets the "old fashioned" way.  Didn't bother to look it up.  The Kiddo just smashed those puppers in the paper and got them to stick.  Works for me!

The finished project and the proud creator:


Well, that's it for me today!!  I get to spend the rest of my "day off" volunteering at the school, grocery shopping and trying to find an ethnic Danish dish that I can make for the Ethnic feast next week.  Oh yeah, and maybe sneak in some play time with my new goodies!! hehe!!!

Thanks for dropping by again today!! Remember that the day is not complete without some type of creativity!! 

Tuesday, November 2, 2010

Extreme Makeover

This past weekend was our little school's Fall Fair.  Each classroom, from K-12, is responsible for a booth (or as in the case of some classes, booths) that will provide either entertainment or food and hopefully raise some funds for the classroom.  The last couple of years, the Home and School has picked a theme for the fall fair and has asked each of the classrooms to decorate with said theme in mind.  This years theme was "Hawaiian/Luau".  And luckily, the weather decided to cooperate and give us a beautiful sunny day to enjoy!

This year the oldest Kiddo's class had three booths:  churros (which, by the way, were very yummy!), shaved ice and a sponge throw. 

One of the teacher's asked if I could update the sponge throw booth.  This is one of those booths where a "volunteer" sticks his/her head through the cut out in a piece of plywood and has the privilege of having someone pay to throw sopping wet sponges at him/her.  There was a board that had been used in years  past and all I needed to do was just update the theme. 

This is what I was given to work with (here comes the photo disclaimer again.  All of these were taken in the garage where I was painting.  The board was 8 ft. tall.  I leaned it up against the cabinets in the garage and had only about a 5-6 ft space between the cabinets and the opposite wall.  Not a lot of room to take decent photos):
 
This photo does not accurately show the horrible condition of this board.  While I saw it come out of the storage bin, it had obviously been left out in the elements for an extended time.  In addition to it being extremely dry with a wonderful splintered texture, it also had CHUNKS of wood missing.  I seriously considered sending the Toad out for a new piece of plywood, but given the fact that it would probably face the same fate as this one, I just decided to work with what it was.

The rattle can paint job was obviously done by the previous students who used this board a couple of years ago.  While I really do admire their skill with spray paint, I do not possess the same ability.  To be honest, I don't know if I ever even attempted to paint a "picture" with spray paint.  Objects, yes.  Picture, nope.  Don't think so.  One full quart of Kilz primer later.....
Then I painted the entire board with a base coat of light blue.  Let me just insert this one fact for anyone who is going to paint a project.  Whether it be a weathered piece of plywood, your living room or a canvas, you get what you pay for in the paint.  I bought the cheapest paint I could find at Walmart for the base.  And the clumps of paint that came out of that can prove it.  For years I have used a combination of the cheap craft paints and good quality paint to  paint murals. Mostly because the small containers are very convenient to haul to work sites.  And the large selection of colors.  But for my house, baseboards and such, I ALWAYS pay for quality paint. It makes a HUGE difference in the coverage and in the "workability" if you are doing any special faux or painting techniques. 

I found a piece of clip art as my inspiration and then drew the rough draft of my image.

Pulled out my drawers of cheap  craft paints and went to work.

I had thought about going with a "buff" body builder, surfer dude, but thought it would be rather funny to use a scrawny surfer instead, given the fact that most of the "volunteers" for this booth would be 8th grade boys.  8th grade boys who think their bodies are getting buff, but in reality, are still scrawny.  Just a glimpse into my demented sense of humor!

The Toad giving his "gnarly surfer impression"


The youngest Kiddo giving his "cool surfer dude" impression


The oldest kiddo giving his "Do I have to do this" surfer impression

Then finally giving in to the stupid fun of it all

And The Toad's favorite part of the whole project:

The "gnarly" mess that I make when I create taking over his garage!!

I still haven't downloaded the actual pictures of the Fair.  That will be for another post!! Thanks for dropping by again today!!  Remember~~creativity comes in all different mediums.  Make sure you explore one today!!
Till next time.......