Friday, July 23, 2010

Ladies Choice

Hey Peoples!!  Happy Friday! As you read this, I am probably on my way to Flagstaff, AZ., to take a continuing education course.  My family is treating this as a mini vacation, but I have informed the Toad that sitting in a classroom from 8 am - 5 pm for two days is NOT a vacation for me!!

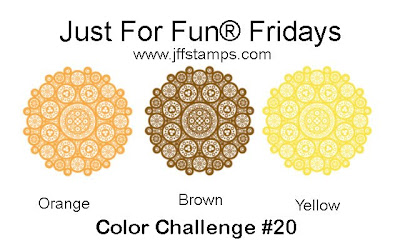
AnyHoos!  Friday means another Just for Fun Friday Color Challenge!  I've noticed that we're getting more players each week, which is very cool!!  I try to look at each participant's project, as I find lots of inspiration in what other's create!!  Remember~~there is a $50 gift certificate from Just For Fun® Stamps that is given away each week!! Aaaannnddd!! You don't have to use Just For Fun® Stamps to participate!! There is no excuse and lots of incentive to play along with us! Just link your creation on the Just For Fun® Blog.

This week we are to use the following colors: 


I'm still trying to play along with the Dare to Get Dirty Challenges on SCS.  In looking over the different challenges and the stuff still on my desk from the last one, I was inspired to create this:


Let's just clear the air about my inability to cut metal straight!! Yes, my metal frame was cut slightly off kilter and so the entire panel looks off.  BUT! I was NOT going to redo the entire thing for a "charming, homemade, artistic " accent that occurred at the end of this endeavor!!

Moving on to the more relevant details on the makings of this!!  The base is a A9 sized card (meaning 8 1/2" x 5 1/2") made of textured grey card stock (I believe it is SU....no guarantees).  The design paper is from my old stash and again, I believe this is a blast from the past SU. 

The dress form image is from Just for Fun®. This is a large image, approximately 5 1/8" tall, so I thought it would work great for some more metal fun! It was stamped on a scrap piece of typing paper and then traced onto the backside of some Brrrrr Blue Metal from TenSecond Studios that was still out on my desk from the last project.  I then embossed the wire lines and stand, while debossing the blank areas.  *I would strongly suggest following the link to the actual image as it would seem my beginner metal working skills have taken out the fine detailed swirls at the waist and has changed the lines slightly!!  I then sanded the embossed lines, giving the image a more realistic "wired" look in real life.  I took a small wire bristle tool and brushed the color away from the main image.  I used a small wheel to emboss the frame for the image (yes, slightly crooked) and sanded it to show the texture more.  The image was then matted using Humungo Tape to the gray panel that was scalloped using SU's scallop punch.  The itty, bitty, teensy little pearls on the dress form were taken off a strip of self adhesive and adhered using a drop of glossy accents.  Half back pears in two different sizes were placed along the edge of the scallops.  The horizontal panel was embossed using the Swiss Dots Cuttlebug embossing folder. 

The wonderfully tied dark navy bow was a RAK (random act of kindness) from the Queen of Bows herself, Anne Ryan.  Thank you Anne!

Make sure you check out what the other team members have for inspiration!! 


Thanks for dropping by again today!!  It is sooo appreciated!!  I probably won't be be back until the end of next week as we won't be home from our trip until late Tuesday and I have work the next three days.  I'm guessing I'll get some blog cruising done in the evenings, so show me what ya got!!  Till then......

Later!!

Tuesday, July 20, 2010

Just call me Pig Pen

Hey Peoples!! I've been working on a card that combines 6 of the Dare to Get Dirty challenges!! I'm tellin' ya~~I'm getting so Dirty that you are going to start calling me Pig Pen!  (rolling in the dirt on that one!!) Today's card combines Bev's, Kim's, Julie's, Amber's, Betty's and Suzanne's  challenges (again~for those of you just joining, details on the challenges will be very vague as these are special challenges for Fan Club Members on SCS.) 

Enough jibber jabber, let's move on to the goodies!!


(eeeeaaakkk!! in this photo the background to the horse and star look a much brighter blue than they are in real life....I SWEAR that in my preview it looked the dark dusty blue that it really is!!)

AnyHoos!! The beginning inspiration was any of the western TV shows that I watched growing up (Bonanza, Wild, Wild West, Lone Ranger, old western movies).  I started with a 5x5 base of SU's River Rock and stamped over it with SU's background Sanded in Blue Bayou ink.  The edges were then sponged with the same ink.  The "design" paper is faux.  I stamped another piece of River Rock with SU's Wanted set medallion in craft ink and embossed using white embossing powder.  The star is from the same set and was stamped between the medallion images with blue bayou ink.  The edges were also sponged with the blue bayou.  The "design" paper was then matted on a piece of Blue Bayou that was distressed and sponged with the same ink. 

The main image (again, from the Wanted set) was stamped with white craft ink and embossed with white embossing powder.  The generation stamping with done with (guess!! come on!!) blue bayou.  The oval was cut  and embossed with my  classic oval Nesties from Spellbinders. 

Now the fun part!! I used a piece of my much hoarded Brrrr Blue Metal from TenSecond Studios and cut it with a slightly larger classic oval die.  I then ran a tiny dot wheel around the edges and sanded off the color to make the dots "pop".  I made the star from the star  5 nesties and traced a small circle in the middle which was then puffed out.  The "squiggles" were added using a fine tip refiner.  I used the same small dot wheel around the embossed edge of the star (all metal products from TenSecond Studios).  The embossed edges were lightly sanded to remove the color. Metal backing paste was used behind the star to keep it from being smooshed flat. 

The suede ribbon strip is also faux.  I took a scrap strip of Blue Bayou paper and ran it through my crimper several times to start the process of breaking down the fibers in the paper.  I then see-sawed it several times over the edge of my desk until I was able to pull apart the layers.  I then sponged lightly with blue bayou ink to darken the roughened fibers. 

The "Wanted" sentiment was the most frustrating!!  There is a "WANTED" stamp in the set, but it was too large for my layout.  I tried to download a western font but could not for the life of me figure out how to open it into a document (have I ever mentioned that I am VERY computer challenge?!).  I finally gave up and found a so-so replacement on my Word program.  THEN my printer jammed several times while trying to spit out the River Rock card stock.  FINALLY I got the sentiment printed , torn and sponged.  Both the sentiment and star embellishment are on dimensionals. 

I have to say that I'm pretty pleased with how this turned out!  It will make for a great card to give to my father in law for his birthday (HEY!! That isn't until October!! For ONCE I'll be ahead of the game!! LOL!!).

I wish I could say that I'm almost caught up with all the Dare to Get Dirty Challenges, but I'm still behind 11!  With my messy house and having to get ready to leave for Flagstaff, AZ at the end of the week for a continuing education class, I don't think that I'll ever catch up!! Oh well!!

Thanks for dropping by again today!!  Remember to make time for some type of creativity in your day today!!  I'm off to get creative with hiding my messy house!! hehe

Sunday, July 18, 2010

Still Getting Dirty

Hey Peoples!! I hope you are staying cool this weekend!  Though we aren't suffering 116 degree temps like some areas, the 104 is still too hot for me!!  But!! It gave me a good excuse to stay locked up in my little cave yesterday and do some more creating!!

After I finished my Drab to Fab Soap dispenser (seriously People!  I really like this one!! The contrast of the metal against the colors for the alcohol inks is just WOW in  real life) I decided to take a look at some of the other Dare to Get Dirty Challenges and the IC challenge. When I looked at the IC site, Georgie Love, I was most taken with the little row of button flowers at the bottom of the Home page. It seemed the perfect jump start to the DTGD challenge by Ryann Salamon to Embrace the Space (again, the DTGD challenge details will be vague as it is a special forum for those who are Fan Club members on SCS.)  This is what I came up with:


This is a 9 x 4 1/4" card.  Making a card this size really shows how much I need a better set up to take pictures as it barley fit into my background area!!  Someday I'll make myself a photo box and do it like the professionals!

AnyHoos!! Onto the details of the makings of this!! Fairly self explanatory.  I started with a piece of Gina K's pure luxury as I wanted (and needed) a sturdy base of support for the flowers. I paper pierced a single row along the base of the card (actually, DS paper pierced it, he thought it looked like fun to poke holes with my piercer!).  I picked out some various buttons from SU's Playground assortment and then cut some grosgrain ribbon in various lengths in certainly celery and artichoke (or is old olive? hmmmm......).  The leaves were made separately and attached  with red liner tape.  I was going to try and figure out how to pierce the dotted line around the flowers and still keep it nicely spaced when I remembered that I had this wonderfully wavy sentiment from Just For Fun that would give me that  look without the headache of trying to line up my piercing!!  I then used a butterfly rub on from American Crafts and placed one on the card base and one on a piece of  a scrap acetate and cut it out and adhered it by it's little body to give dimension to the the wings. 
Easy Peasy!!

Thanks for dropping by again today!! I think my MoJo has decided to stick around.  I've got a few more ideas brewin' in my noggin and after I do a little bit of cleaning I'm going to see if I can get a couple of them transferred from my brain to actual creations!!  I hope you remember to take time for some creativity in your day!!  Later!!

Saturday, July 17, 2010

Dare to Get Dirty

Happy Saturday Peoples!!  This weekend is the Dare To Get Dirty on SCS.  This is a special challenge for Fan Club members to join the Dirty Dozen (past and present) in  some special challenges to show how we mere wanna be's would get in the dirt!!

I glanced at the challenges this morning before I went for a walk.  Somewhere along the way,  Mojo must have decided that it was WAAAAY too hot to be a runaway and decided to come home.  So, I tackled Kittie's Lost and Found Challenge first(Warning:  details of the challenge will be somewhat vague as you have to be a Fan Club member to participate.  Trust me, it is well worth the $$ per year!!!)


I started with this glass soap dispenser that I have had tucked into a corner for probably 10 years (I vaguely remember that this was suppose to be a alterable craft at a MOPS (mother's of preschoolers) group but I think my MoJo had taken a hike that week also (what is with my MoJo anyways?!!  Always deciding to leave me high and dry at the most inconvenient moments?!!).  I added some alcohol inks in Meadow, Rust, Stream and Copper to the entire bottle.


Then I decided to put into action TenSeconds Studios "Drab to Fab" challenge and add some metal.  I had some small squares of copper metal from a starter pack that I got at CHA in January.  I pulled out my
Spellbinders Daisy Heads dies and went to work cutting out and embossing the different sized daisies.  I then increased the depth of embossing by leaving the metal in the die and using a paper stump and refiner to define the edges a bit more.  I then place all the dies on a piece of Humungo Killer tape.  Hint:  it may prove much easier to go ahead and place the tape on the metal before die cutting.  Let's just say that cutting that EXTREMELY sticky tape was a JOB!!   I got smart with the leaves after an hour of tedious cutting of the daisy head and cleaning of my snips!!  I removed all the liner off the flowers and leaves and placed them randomly on the bottle.   Results?  Definitely FAB!! hehe


I found the quote online and printed it out on glossy card stock.  I then used the same colors of alcohol inks that were used on the bottle and went over the sentiment area.  The tag was cut using Spellbinders Labels Eleven.  I uses my cropadile to place a copper eyelet and threaded some copper cording and black ribbon to attach the tag. 

Here are a couple of other views of the finished project (not the best quality, but I was having a devil of a time getting a decent picture without glare due to the glass!!)        


And a close up that shows the embossing detail  a tad better


I have envisioned the copper turning a lovely patina as it sits on the counter, blending in with the inked glass.  We'll see! LOL!!

Well, I'm hoping that MoJo decides to stick around a bit more today.  I need to take a break and clean up this mess and tackle the kitchen mess, but I have a couple more ideas starting to form in my noggin!!

Thanks for dropping by today!! Remember to include some type of creativity in your day!!

Friday, July 16, 2010

REWARD!!

I'm am offering a reward for whoever finds my MoJo.  Seriously.  I'm that desperate!  At first I thought he/she (who knows?!) was pouting because I have spent my week working full time covering for a vacationing therapist.  But I then realized that MoJo may have actually run away from home.  What made me come to that conclusion?  I have some NEW stamps sitting here and NOTHING.  NADDA.  ZIP.  ZERO.  MoJo is DEFINITELY not in the house!!

  It's Friday and time for the Just For Fun Friday Color Challenge.  This week's color combination comes from Sherry:


And guess what?  Yep.  I don't have a project for you.  Well.  Not yet.  I am really hoping that I can convince MoJo back into my office this weekend.  Cross your fingers.  I'm even willing to resort to bribery.  I just have to figure out how one bribes a MoJo. 

BUT!!  Lucky for you, there is OODLES of inspiration that can be found on the other team member's blogs: 

and

I hope you will join in the fun and create something for the challenge!  Remember~you don't have to use Just For Fun® Stamps, and there is the possibility of being the week's winner of a $50 shopping spree at Just for Fun®!  Just use Mr. Linky and share your creation with us on the Just For Fun Blog!

Thanks for dropping by again today!! I'm going to cross my fingers that MoJo doesn't like the predicted 100+ degree temps and comes home tomorrow so that I can have a good excuse to lock myself in my little craft area!!

Friday, July 9, 2010

A Moment

Happy Friday Peoples!!  I'm REALLY excited about today's Just For Fun® Friday Color Challenge!!  Today's colors are much more down my alley (meaning~~no PINK! hehe)


BUT more importantly~I had a guest designer help with today's project!!  My youngest kiddo came into my office to complain that his older brother wouldn't play with him (the cross a 9 y/o must bear when your older brother is 13!).  The Kiddo is creative, but has to be in the "mood".  He has definite ideas for his handmade projects and I try to only make suggestions instead of telling him how to do something (not that he won't say, "Nah....I was thinking of something like this")  I decided to throw caution to the wind (as I'm down to the last hours in being able to make something for today's challenge) and I asked him if he wanted to play around with my stuff and help me with today's project.  So we got out some "fun" stuff and this is what we came up with:


I had Tim Holtz's Fanciful Flight die on the desk and the kiddo decided he wanted to use that. We got out the alcohol inks and I actually demonstrated the colors that I had planned on using, but the kiddo decided that Rust, Pool and Butterscotch looked better than my blues! He applied the inks on glossy cardstock and then went over the inks again with the blending solution to mute them a bit more.  We die cut the butterfly using Tim Holtz's Fanciful Flight and the kiddo sponged the chocolate chip layer randomly with Walnut Stain Distress Ink.  Believe it or not, the Kiddo is the one who came up with the idea to make a flower for the butterfly to "land on".  I told him I was thinking of using this sentiment from Just for Fun and after I explained the meaning to him, he agreed.  After some debate on how we were going to use the sentiment and the flower idea, we pulled out the Peony Spellbinder die and die cut the bottom layers from K&Company's Ancestry line and the "center" from a piece of very vanilla using the kiddos favorite machine, the Big Shot.


The Kiddo then sponged all the edges of the flowers with Vintage Photo while I sponged the "center" of the flower with some Antique Linen and Tea Dye. 


I then did some selective masking to get the image to fit properly onto the center of the card with the help of my every trusty stampamajig.  The sentiment was stamped using Broken China Ink. 

We then decided that our focal points were getting a tad large for a card.  I pulled out a small canvas that I had and the kiddo did the wrinkle free distress technique using Distress Inks in Broken China and Tumbled glass.  Instead of spritzing with water, he spritzed it with Tattered Angels Glimmer Mist in Frost.  Now, when using a canvas, the pores of the canvas do not absorb the ink like paper does.  I have found that taking a stencil brush or paint brush and pouncing the ink into the pores of the canvas works well to spread the ink. 

We then played around with a some different flourishes and papers before deciding we liked the Flourish #2 from Sizzix the best.  It too, was cut out of K&Companies Ancestry line. 

Ok...to be honest ~~this is where the Kiddo lost interest (and the time where his brother said he would play with him!).  So, deserted, I layered the flower using dimensionals and added the 1/2 backed pearls.  The butterfly was attached in the corner, with it's body also on dimensionals. 

One last photo of the guest designer:


This was a special creative time with my Kiddo that I will put into my heart's treasure chest!!

Now, just as a reminder~~playing along with us on the JFF blog gives you the opportunity to win a $50 gift certificate for a fun shopping spree at Just For Fun® Stamps!  You don't have to use Just for Fun stamps, so there is no excuse not to play!!  For more inspiration, make sure you check out the other designer's projects to get your creative juices flowing!

and

Thanks for dropping by again today!! I hope that maybe you can find some creative time with a loved one this weekend!! (hmmmm.....take that anyway you want! LOL!! I can't come up with another way to say it now!!)

Wednesday, July 7, 2010

WHOOHOO!! It's a COLOR THROWDOWN CELEBRATION!!

Happy Hump day Peoples!!  Today is an exciting day as it is the 100th COLOR THROWDOWN CELEBRATION!!  Talk about a PARTY!  Check out THIS list of companies that are sponsoring fabulous prizes!  Just for Fun® Stamps is one of the many proud sponsors of this party and will be giving away a $25 gift certificate, which can be found on Broni's blog!

Now, for the colors!!


Sitting on my desk is an invitation for my oldest  kiddo to attend a Luau theme birthday party this weekend.  When I saw these colors,  a TROPICAL theme got stuck in my noggin and this is what I came up with:


Now somehow, my "Regal Rose" took a brighter  pinkish-rose tone.  I think my subconscious took over on the tropical theme, hehe!!  I kept this a pretty CAS card as I think I will use it for the 13 y/o girl's b-day card (YIKES!! It looks like the mixed teen parties are about to begin!!).  The base is a 5 1/2" x 5 1/2 " piece of Gina K's pure luxury cardstock.  There is a slightly smaller layer of SU's Baja Breeze that has the same ink sponged along the edges.  Another scrap piece of the pure luxury was run through the Cuttlebug with the Swiss Dots embossing folder and sponged over with Baja Breeze ink.  I then stamped the Large Cherry Blossom from Just for Fun® onto some scrap pieces of the pure luxury paper with Ranger's Archival Jet Black ink.  The flowers were then colored with my Copic Ciaos and cut out.  The leaves were cut free hand from SU's Certainly Celery and then I took the certainly celery ink pad directly to the paper to add some subtle depth of color.   Both the flowers and leaves were then spritzed with Tattered Angels Glimmer Mist in Pearl.  The leaves were taped to the card base, leaving the edges loose.  Two of the three flowers were adhered using dimensionals to add some more depth.  I then stamped the Happy Birthday (also from Just for Fun®....sorry, I cannot find the direct link at this time!!) onto a scrap piece of the pure luxury (have I ever mentioned how much I LOOOVE this paper?!!) and cut out the "flag" and sponged along the edges with the Baja Breeze ink. 

I played around with adding some more baddabling, but just couldn't get anything to tickle my fancy, so decided to call 'er done! (now you know the real reason this is a CAS card!! haha!)

Make sure you check out the other Just For Fun® Designers who are participating in this celebration!

And of course you don't want to miss

I hope you join in on the celebration and share your projects on the Color Throwdown Blog!

Thanks for dropping by again today!!  Remember to make time for some type of CREATIVITY in your day!!

Friday, July 2, 2010

Girly Washers

Happy Friday Peoples! Well, to be honest, it is actually Happy Hump Day.  But I'm having to work full days to end the week which leaves little time for blogging.  Through the wonders of modern technology, I get to skip Thursday.  Sigh.  Wouldn't it be lovely if you really could do that on occasion?  Not all the time, just every once in a while.......

AnyHoos!! I digress!!  It's time for another Just For Fun® Friday Color challenge.  This week Sherry has challenged us all to use the following colors:

Without whining, let me just make this statement:  "I, being the ungirly girl  that I am, consider purple to be in the same category as PINK."  'Nuff said.
                                                 
BUT!! In complete contradiction to the above statement, I was inspired to make a totally girly project! Remember my little rambling about having fun exploring new creative ideas?  Wellllll, here are the results!!

                          
I have wanted to alter metal washers since I saw this technique on SCS.  I have had a stack of washers sitting on my desk for MONTHS, just waiting for me to give it a go!!  I started by covering a piece of glossy card stock with Meadow, Eggplant and Stonewashed alcohol inks. I then used the same inks to cover both surfaces of the washer (see picture below).  I traced the washers onto the back of the inked card stock and carefully cut them out (as it would seem I either had a punch/nestie that was too big or too small to make this an easy task!!).  I used my Cropadile to punch out the center holes.  I then stamped Leaf Sprig with Berries and Distressed Music Block from Just For Fun® Stamps using Archival Jet Black Ink onto the cut paper.  I gave each image a blast with my heat gun to make sure the ink was set.  I used Tombow's Metal Glue to adhere the paper to the washer.  After I was sure the glue had dried, I applied a thick coat of Inkssentials Glossy Accents over the images and set aside to dry over night.  I then flipped the washer over and applied another thick coating of the Glossy Accents to the backside of the inked washer.  I then went over the all edges with a light purple copic marker to blend in the sanded paper edges and the outside edge.

I had previously bought the cording that is around the music pendant so that was a quick finish to that project.  But then I got the wild hair to try and make my own beaded necklace strand.  I found a cheap kit at Walmart and made my own pattern from the goodies.  My biggest frustrations came in not knowing what I was doing and trying to rig a way to attach the necklace to the washer (belatedly, the Toad informed me he thought he could have drilled the washer). That, and I kept spilling the beads off the wire while trying to see if my length was where I wanted it on both strands!   I'm sure that there is an easier and cleaner way to do this (besides trying to hold wires in my hands!!).  I think I will have to check out some books on jewelry making before my next attempt!!


This picture shows the backside of the washers.  I thought that glazing the inked washer would give an option on how to wear the pendants.

I have to say that these washer pendants can get addicting! I'm already thinking about venturing into some matching necklace and earring sets for the girls at the office for the "small" Christmas gift exchange! Of course, that is after I do some studying on the subject instead of the usual fly by the seat of my pants! LOL!

For more inspiration, make sure you check out what the other team members came up with!!


 and

Thanks so much for dropping by again today! I just want to take a moment and THANK those serving our country in the military for continuing to fight for our freedoms that we tend to take for granted!! And to your families~~for they are serving too!!

I hope you all have a SAFE and hopefully CREATIVE holiday weekend!!